Tristone is a solid surface that brings a seamless look, warm touch, and practical durability to busy homes and commercial spaces. It is non-porous and resistant to heat and moisture, so light surface marks can be restored without replacing the worktop. How to repair scratches on Tristone worktops? Premium Worktops supplies and installs Tristone and confirms that minor damage is easy to refresh, with the added option to request a free sample or complete an online quote.
Understanding the Resilience of Tristone Worktops
Tristone worktops are recognised for their robust, long-lasting surfaces that elevate kitchens and workspaces with a seamless, luxurious look. Their engineering blends durable minerals and pigments to deliver solid, non-porous, and thermoformable surfaces that stand up to frequent use. The resilience of Tristone comes not only from its stone-like hardness but also from its capacity to resist moisture, heat, and daily wear while maintaining a welcoming, tactile finish.
With Premium Worktops Direct, our clients experience superior service and bespoke installation using only genuine Tristone products. Understanding what makes these worktops so resilient can help users appreciate their value and maintain their pristine condition over time.
What Makes Tristone Forgiving to Repair
Unlike many stone surfaces, Tristone sheets are joined to appear as a single continuous slab. That seamless finish, together with the non-porous composition, means colour and texture are consistent throughout the material. As a result, controlled sanding and careful polishing can blend away minor scratches and keep the surface hygienic. Premium Worktops highlights these benefits and the ability to create integrated sinks and coved upstands that also respond well to careful refinishing.
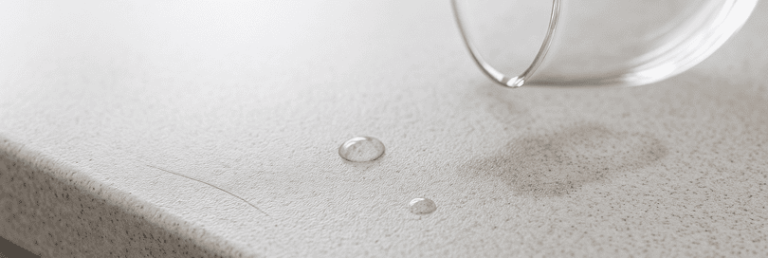
Check the Mark before You Begin
Start by assessing what you see and feel. A shallow scuff that is visible only in strong light usually needs a very light touch. A mark that you can catch with a fingernail will need a little more work. Deeper grooves and damage near a seam are best left to a professional technician. The aim is to choose the least aggressive method that will even out the surface.
Tools and Materials
- Microfibre cloths for cleaning and drying
- A non-abrasive cleaner made for solid surface materials
- A set of abrasive pads or papers in fine grades through to ultra-fine
- Clean water for damp sanding
- A specialist polish for solid surfaces and a soft polishing pad or cloth
Start with the least abrasive option, keep pads clean, and wipe between grades. This keeps the surface even and avoids introducing fresh marks.
Method for Light Scuffs
- Clean the area with a non-abrasive cleaner and a damp microfibre cloth. Dry fully.
- Using light, overlapping circles, buff with an ultra-fine pad. Keep pressure gentle and steady.
- Wipe and check in good light. Repeat once if needed.
- Finish with a suitable solid surface polish so the sheen matches the surrounding area.
These short steps are usually enough for faint marks and day-to-day rubs.
Method for Moderate Scratches
Prepare the space. Clear the worktop, clean, and dry.
- Dampen the surface. Begin with a safe starting grade for solid surface, then work in small circles that extend slightly beyond the mark.
- Step through progressively finer grades, wiping away residue between each stage.
- Polish to blend the sheen until the repair area is indistinguishable from the rest of the worktop.
- Progressing gradually makes the transition invisible and preserves the uniform look that Tristone is known for.
Method for Deeper Grooves
If a scratch clearly catches a fingernail or looks pronounced from a distance, use a careful, staged approach.
- Begin with the coarsest grade that is still safe for a solid surface. Work gently along the groove first, then widen your circles to blend.
- Move through medium to fine and ultra-fine grades without skipping steps. Each stage should remove the previous scratch pattern.
- Finish with a solid surface polish. On satin finishes, stop when the area looks even. On higher gloss, extend the polish stage until you return to a consistent shine.
For damage that crosses a seam, sits near a sink or hob cut-out, or shows impact or heat stress, speak with Premium Worktops for a pro-level resurface. Their team offers nationwide fitting and support, and can provide a same-day quote.
Aftercare to Prevent Future Marks on Tristone Surfaces
- Use chopping boards for knives and food prep
- Lift heavy pans and appliances rather than sliding them
- Fit soft feet to small appliances where possible
- Wipe spills promptly with warm water and a non-abrasive cleaner
- Avoid scouring powders and wire pads that can dull the finish
- Refresh occasionally with a suitable polish to maintain a consistent sheen
These simple habits reduce the risk of fresh scratches while keeping the tactile Tristone finish looking new.
When to Call Premium Worktops
If the kitchen worktop needs a full refresh, if a mark crosses a join, or if you can see chips or star cracks, a professional visit is the safest route. Premium Worktops fabricates and installs Tristone and offers a straightforward process that starts with a free online quote. You can also request samples to compare colours in your own light. For phone support, contact 0113 3205877.
Helpful Ways to Get Started with Your Tristone Kitchen
- Request samples to check colour and finish at home, then shortlist favourites for kitchen worktops.
- Complete an online quote with layout, cut-outs, and delivery details so the team can respond quickly.
- Ask for advice on finishes and aftercare during the templating and installation stages for a result that is easy to maintain.